First up, Oscar needs a little cake topper. Taking heavy inspiration from The Small Object and Lollipop Workshop, I started painting clothespin dolls last night. This guy up front is my favorite, and I think he looks the most like Oscar.
birthday prep is in full swing
First up, Oscar needs a little cake topper. Taking heavy inspiration from The Small Object and Lollipop Workshop, I started painting clothespin dolls last night. This guy up front is my favorite, and I think he looks the most like Oscar.
10 minute cardigan fix
Take this cardigan, for instance. Love the color, love the ruffle, but the fit is SO bad. It was the first post-pregnancy shirt I bought for myself. I liked it at first, but as the baby pounds came off I wore it less an less. A shapeless pink sack is not flattering, even with a ruffle.

Much better!

working on a display
In other news, I have 7 1/2 yards of felt scheduled for delivery today. I've never been so eager to see the UPS guy.
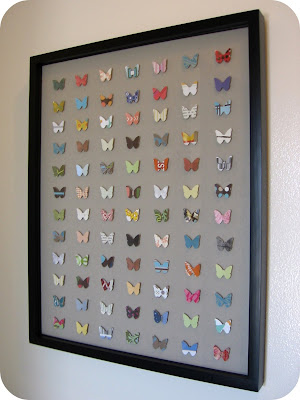
paper punch art
You can find other versions of this project at Samster Mommy, LollyChops, and Peacock Chic.
colors are nice
Pop on over for a tutorial on using a classic Golden Book, like this:

sock monkey for craft hope
We were supposed to make sock monkeys this time.
painted wood blocks
Over the summer, an Elmer's representative sent me a giant box of craft supplies. According to them, I am a "respected blogger and crafter" (giggle, snort). Anyway, Elmer's has this whole line of craft stuff that I didn't know about, so I am trying things out.
I've had these plain, 1 1/2 inch wood blocks for, oh, forever, that I've been meaning to decoupage with pretty paper (like these beautiful babies). Instead, I decided to try out my handy dandy Elmer's Painters pens. Because there is nothing I love more than a slap-dash craft.
It was really simple - I just drew a border with letters, numbers, shapes, and a few little pictures on all the sides of the blocks. Most of the letters are in all the colors, and then I did an extra set of letters in black that spell out Oscar's name.
The paint dried really fast, so I didn't have to wait around before flipping them over to do another side. The markers I used were in the "bright" and "neon" packs, and the neon is a little, well ... neon. But Oscar likes them and that's what really matters.
We've been playing with these non-stop over the weekend. I build tall towers, and Oscar knocks them down. I spell out words and Oscar steals my letters. Hours of entertainment.
And these blocks are making him smarter already. Look what he spelled out for me tonight!
;)
works in progress
Anyway, I've started painting some little wood blocks for Oscar. They'll have letters, numbers, and shapes by the time I'm finished. I'll tell you more about these in a future (hopefully near future) post.
I feel like it needs more color and something pretty. This is my happy place, so I need a good dose of cheer when I open those closet doors. And since I only have, oh, a third of my supplies in here so far, I'm going to have to get smart about more storage. I'm thinking more drawers up on the closet shelf. Any ideas?
tissue paper art

- So first, gather your supplies. I think this would also work well with pretty wrapping or scrapbook paper, but tissue paper works especially well because it is so thin. If you don't have any canvases to cover, you could cover a thin piece of cardboard and put it in a frame. You'll also need Mod Podge, a paintbrush, and a picture hanger if you are using a canvas.
- Cut the tissue paper to the size of the canvas, leaving about 2 inches to wrap around each side.
- Apply a thin coat of Mod Podge to the front of the canvas.
- Carefully lay the tissue paper on top of the canvas. Working from one corner, press the tissue to the canvas, smoothing out any wrinkles and bubbles. You can pull the tissue up if you make a mistake, but be gentle because it is so delicate, especially when wet.
- Apply Mod Podge to the sides of the canvas and wrap the tissue paper around it, as you would wrap a present. Set aside to dry.
- When the front and sides are dry, flip the canvas over. Apply more glue to the back of the canvas and press the tissue paper to secure. I added a top coat of Mod Podge over the back edges to make sure they would not come up.
- Add a picture hanger and find a the perfect spot to display your new, one-of-a-kind artwork.
office chair makeover
Popular Posts
-
I think it is time to get back to our regularly scheduled crafting. Have you ever made your own books? I used to love to write and illustrat...
-
The Bella Twins (born on November 21, 1983) are a female professional wrestling tag team consisting of twin sisters Brie Bella (Brianna Ga...
-
HOT AUNTY BLOUSE BACK-MILKY WET BLOUSE -AUNTY BACK BLOUSE BACK HOT Posted on February 9th, 2011 by Admin ...
-
Hot Malayalam Bhabhi Aunty navel show and sari pictures. Malayalam Bhabhi Aunty Navel. malayalam bhabhi aunty navel sari photos. Malayalam b...
-
Here's a variation on the gift jar from my last post. For a different look (and more instant results), you can use Elmer's Painters...
-
Watch duds the perfect body of indian aunty or bhabi pictures. She appears alluring and voluptuous. This Auinty is in blue wet saree/sari. I...
-
Unbelievable Malayali Chechi Hot Aunties Red Saree Pictures. She is the heroine of Malayalam film as well as Bolly film. Watch red saree Mal...